Greek Chicken Harvest Bowls

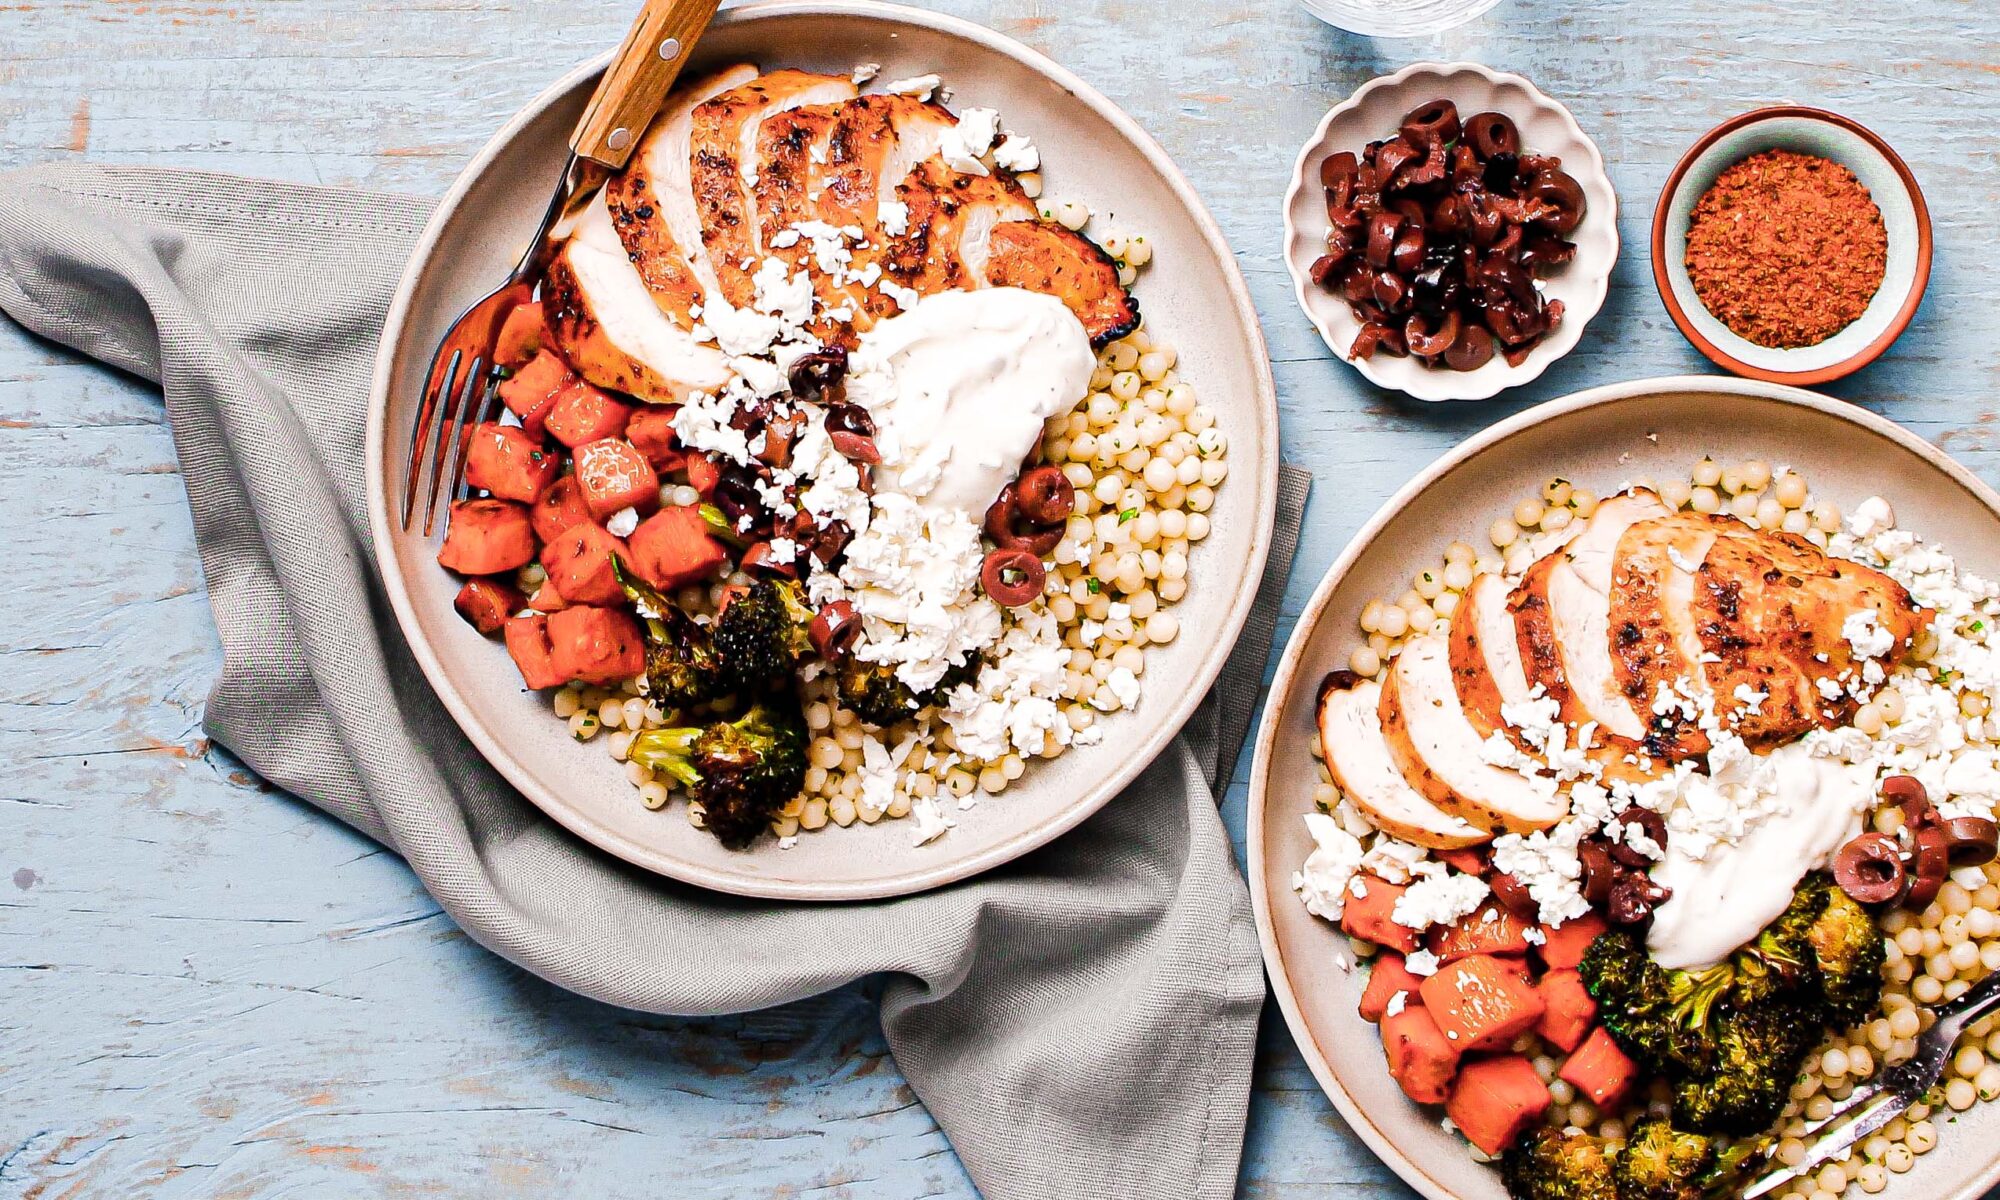
Our Greek Chicken Harvest Bowls are satisfyingly savoury, easy to prepare, that every member of the family will enjoy! A quick and healthy one pan dinner for those late weeknights, for meal prep or a breeze to whip up on those busy weekends. The mix of Krinos souvlaki seasoning, Kalamata olives, and feta pack a punch that gives everyday chicken dinners a much-needed makeover. To take it to the next level, we add our new creamy Greek Yogurt Tzatziki Dip right on top to finish these bowls with extra flavour.

Follow along below and maybe this could be dinner tonight!

First you will need to preheat your oven to 375 F. Add your broccoli florets and diced sweet potato into a bowl with olive oil, salt, and pepper. Mix to ensure an even coating of oil and spices then transfer to a 12×18 toasting pan lined with parchment paper making sure they are in an even single layer. Don’t skip this step, it ensures even cooking. Set the mixing bowl and what is already in it aside and add in the remaining olive oil and Krinos souvlaki seasoning. Massage this all into the chicken so all pieces are evenly coated and have the flavour locked in. Add the chicken to the other half of the roasting pan.

Place the roasting pan into the oven and roast for 15-20 minutes until cooked through. Be sure to flip everything halfway through. You will see slight browning around the edges when everything is nice and roasted. (Note that chicken needs to be cooked safely to an internal temperature of 165 F or higher). Once they are removed from the oven, allow to rest and then slice or dice to your preference.

While the chicken and vegetables are roasting, get started on the Israeli Couscous which is the delicious, base for your bowls. Israeli Couscous differs from traditional Couscous in that it is much larger and heartier, it is also called ‘pearl’ couscous because of its size and shape. Get your salted water or chicken broth to a boil in a medium sized pot and cook the Israeli Couscous according to the package directions. Drain and toss in a splash of Krinos Extra Virgin Olive Oil, parsley, and lemon juice until combined.

Have your roasted chicken pieces, vegetables, dressed couscous and all the amazing toppings set up like an assembly line for ease in creating these beautiful bowls.  Evenly divide the couscous between the bowls, top with the roasted vegetables and chicken, then add the crumbled feta, pitted olives and a healthy helping of our new Tzatziki Dip. Want a spicier kick? Use our Jalapeno Tzatziki Dip!

A one pan dinner that translates into a creative and exciting new way to enjoy the humble chicken breast. A fun family tip to get the kids involved – set up their bowls with the couscous base and allow them to add their own toppings!

Click here to discover the recipe.

Cilantro & Feta Grilled Corn Ribs

Corn on the cob is a summer staple and we have an upgrade to this classic that you won’t want to miss out on! We have the ultimate corn side dish or vegetarian main – Corn Ribs! The way the corn is cut off the cob makes for this unique shape that is easy to prepare and even easier to eat. A good slather of our loaded butter and a bright topping of feta are the perfect partners to this crunchy, craveable corn!

Ready in under 30 minutes here’s how it’s done:

Preheat your BBQ to 350o F (note this can also be done on an indoor grill or Air Fryer).  Ensure your ears of corn have the husks and as many of the silks removed as possible.

Trim the top and bottom of each ear of corn so they are flat on both ends. Then cut each ear of corn in half in the middle. Take each half, stand up on the widest part for more control, and cut in half vertically. This is the part where we now get our corn “ribs”, when you then take each halves that you have just cut and cut them into quarters.

Give each corn rib a light brush with vegetable oil and place on the hot grill and allow to cook for 3-5 minutes or until slightly charred.   (This is where you can add into your Air Fryer and cook according to the instructions for your specific appliance). Get your melted butter ready because this is the best part!

Once the corn is charred to your liking, remove from the grill onto your serving platter and slather with the melted butter and a sprinkle chili powder or flakes. Top with a generous helping of crumbled feta and the chopped cilantro. For another layer of flavour, place tangy lime wedges around the platter to be squeezed upon serving. You have now mastered the corn rib – a dish your guests will be asking you to make again and again!

Click here to discover the recipe.

Summer Tomato Salad with Grilled Peaches and Feta

That’s right, we said ‘grilled’ peaches, but don’t worry it’s easier than you think. Sweet Ontario peaches are now in season! We’re going to combine this tasty fruit with our Krinos feta to add some excitement to a simple heirloom Tomato Salad. This recipe plays on the perfect combination and contrast of the sweet peaches and salty feta, while highlighting these juicy and fresh heirloom tomatoes. This will sure be a treat, are you ready? Let’s get started!

Preheat a well-oiled barbeque to 350˚F to grill the peaches to perfection. As the grill is heating up, cut up your peaches in quarters and toss them in just enough oil that lightly coats them. Once the grill has reached its required temperature, place them cut side down on the barbeque. To achieve those nice grill marks, cook the peaches no longer than 2-4 minutes. Flip pieces to the other side and proceed to cook for an additional 2-4 minutes. Once completed, set aside your peaches, and begin to prepare your salad.

Cut your heirloom tomatoes into wedges or rounds approximately 1cm thick and cut the heirloom grape tomatoes in halves. These tomatoes are perfectly ripped and full of flavour as they thrive in the month of July! As they add an earthy, almost smoky sweetness to them that really complements this salad. Grab your favourite Krinos feta and crumble them into bite-sized or block sized pieces, we won’t tell!

As we begin to assemble the salad, layer the fresh sliced heirloom tomatoes onto a serving platter, then followed by the halved heirloom grape tomatoes. To enhance these flavours, use a pinch of flaky sea salt and cracked black pepper to season your tomatoes to the desired taste.

Once completed, nestle the grilled peaches in and around the seasoned tomatoes. Generously sprinkle Krinos Greek feta evenly across the dish, its rich buttery bite taste will dance with the sweetness of the peaches on your palate! As a finisher, top your dish with a drizzle of Krinos Extra Virgin Olive Oil followed by Krinos sweet Balsamic Glaze, then sprinkle in some fresh or flake basil leaves and your meal is ready to be served!

This dish is easy to whip up on those busy weeknights or will leave your guests wanting more! This Tomato salad with grilled peaches and feta will always be a classic summer staple, enjoy it while you can!

Check out the recipe here

Hot Honey-Garlic Air Fryer Wings

Create an amazing menu for dad this Father’s Day centered around our new recipe Air Fryer Hot-Honey Garlic Wings. Hot-honey has been one of the fastest growing food trends and it is here to stay! The simple combination of spicy hot sauce with sweet, sticky honey makes for the perfect condiment, especially with chicken wings. Check out how we make ours featuring Attiki pure, raw Greek honey for the ultimate Father’s Day feast.


Using the air fryer is not only the healthier option but cooking is a breeze and cleanup is quick and easy! To prepare the chicken to have the perfectly crisp skin, pat the wings with paper towel to absorb any excess moisture and have them as dry as possible. Toss them in the spice mix to and ensure it really adheres to the outside.


Next, place them into your air fryer preheated to 425˚F in a single layer making sure there is space around each wing to ensure even cooking all the way around. Depending on the size of your fryer you may need to cook multiple batches. Cook 10 minutes on one side and another 10 on the other until you see that golden brown skin and are cooked through.


While the wings are getting crispy and delicious you can use that time to prepare the ultimate condiment! The hot-honey garlic sauce can be used on a variety of proteins, not just wings – try it with tofu for a vegetarian version. In a small pot, first melt some butter and then add in minced garlic, thyme, Attiki honey and Sriracha – give it a stir to combine. The ratio of hot sauce to honey here is 3 tbsp of hot sauce to 2 tbsp honey – this can be adjusted to suit your preferred heat level and any hot sauce can be used!


Once the wings are done cooking, you can toss them in the sauce for that good-type-of-messy or on the side for those who like to control their spice level. Either way these will be gone in seconds – get your napkins ready!

Check out the recipe here

Ruffled Fillo Rose Milk Pie

A beautifully crafted treat for mom this Mother’s Day our Ruffled Rose Milk Pie! A little effort goes a long way with this dessert. A crowd-pleaser that will have mom asking YOU for the recipe! Crispy golden Fillo is shaped into delicate roses and then baked with a creamy vanilla custard with notes of cinnamon, lemon zest and fresh berries and of course icing sugar on top for the *chef’s kiss* to finish it off.

Start with an oven preheated to 400°F and a pot ready with melted butter and a brush. First brush melted butter onto the bottom of the casserole dish you are using. Scatter half the raspberries and blackberries evenly on the bottom for a little treat in each bite!

Ensure that when unrolling the fillo sheets it’s kept covered with a damp towel – this is key to prevent drying and cracking. Brushing each layer with melted butter is also important. Scrunch the fillo into a rope and then coil into the shape of a beautiful rose! Place on the center of the dish on top of the berries and continue this until you have a dish full of delicate fillo roses! If there are any extra spaces, buttered scrunched fillo can be added to fill.

This will be baked off, for about 18-20 minutes or until lightly golden first while you prepare the custard.

The custard is a simple blend of eggs, honey, whole milk, cream, and vanilla whisked together until combined. The addition of cinnamon and lemon zest gives a warmth and tang that helps set this dish apart. The custard is gently poured around the golden roses, ¾ of the way up the dish, to ensure they remain crisp on top and baked to set. Pop back into to the oven for an additional 12-15 minutes just until the custard springs back when touched.

Allow to cool for 5- 10 minutes then top with remaining berries, a dusting of powdered sugar and fresh mint for that restaurant quality feel. Serve warm for the perfect Mother’s Day treat.

Check out the recipe here